Gelatin Print Project Part 1
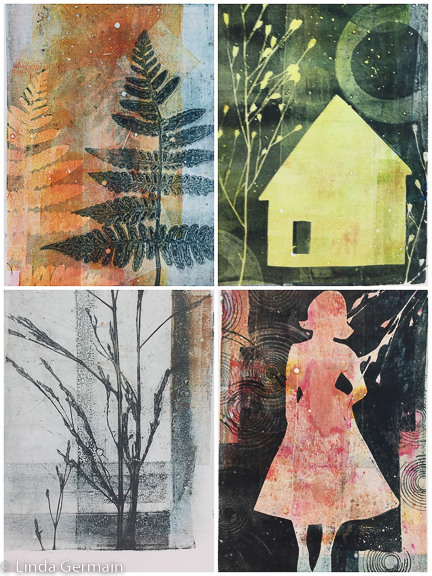
This is a good place to start. We will build the foundation and get to know the inks and tools. You will learn to pull prints like these 4 below.
This is the lesson breakdown:
- Build a light base with variety. Get the most from your brayer. Build light layers and shapes that will serve as the foundation for completed prints. Use the gelatin plate as a ink palette. Find tools to stamp into the thin layer of ink to add a mid range value to the foundation prints. Really explore what kind of marks are possible.
- Print with Found Object Stencils. Use found stencils to pull a dark focus on the foundation prints. We will cycle through this lesson several times through out the class. Expand your design skills and rely on strong value changes and interesting shapes to create a pleasing print
- Cut Focus stencils. Masking stencils are one of the key tools. Take a day and cut a few stencils that will be the focus of your prints. .
- Print a dark layer with cut stencils. Magic of layering starts to happen. Get bold impressions with interesting division of space and delicate detailed impressions.
Start with part 1 if you want to build a good foundation. Part two and three will be offered at a later date.
Next session Jan 10-13, 2025
Register Now
Click Here to Pay $80
Course starts
Use credit or debit card
You will be prompted to create your private student login
and then to make your payment.
Join us Today
If you have any questions, please check out the FAQ’s page and you can find the supplies page here. Then email me with other questions. Linda (at) lindagermain (dot) com
Next session Jan 10-13, 2025
Register Now
Click Here to Pay $80
Course starts
Use credit or debit card
You will be prompted to create your private student login
and then to make your payment.
Join us Today
