relief prints

PEACE block print for #SEEdrawPrint challenge

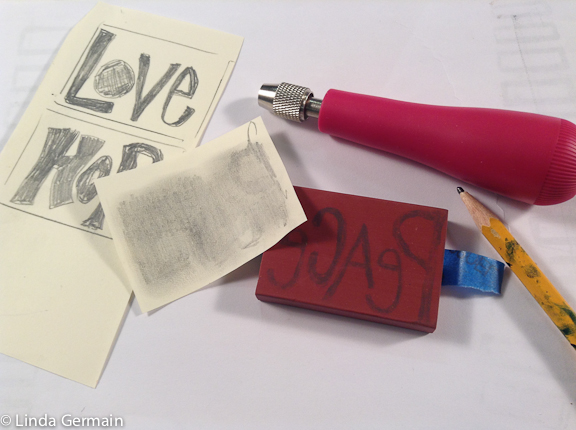
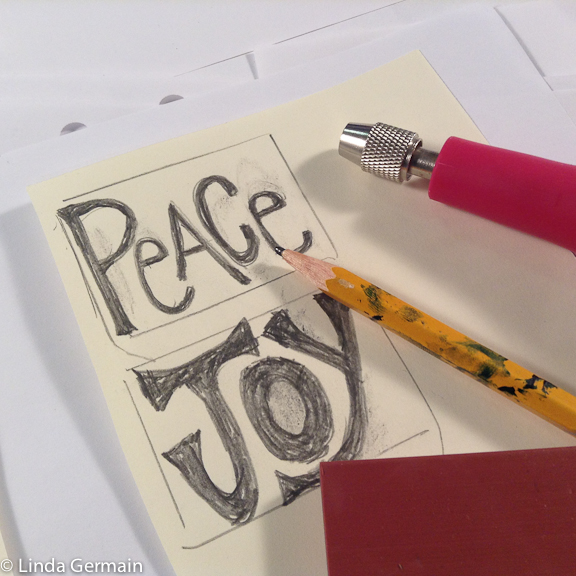
I like to add text to my prints. So I doodled peace, love, hope and joy. Today I carved the “PEACE” block out of an eraser.

soft carved peace stamp

I transferred the pencil image to the block by taping the drawing face down onto the block and burnishing on the backside.

Burnish to transfer design to block

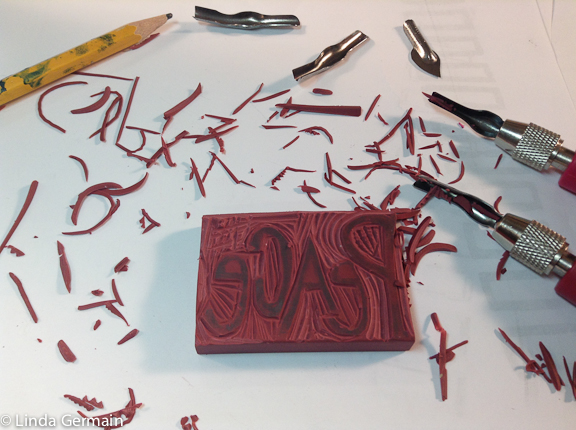
That works out great to reverse the image so that it prints out correctly. I used my speedball carving set to scoop away the background and leave the PEACE.

soft carve eraser block for printing

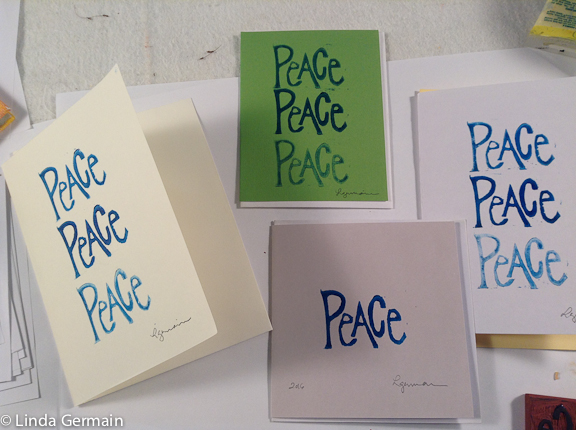
I was able to get a pretty clean carving. It printed up nicely without a lot of noise from the background. I printed some test impression on scrap paper and then printed a couple of cards.

hand printed cards

I like how it looks with the PEACE in different values. I inked the block once and printed it 3 times. I experimented with printing on different colors and textures.

Check out a few more block printed images  a leaf, an abstract stone and abstract patterns with foam blocks.

PEACE block print for #SEEdrawPrint challenge Read More »
Beach rocks inspired print

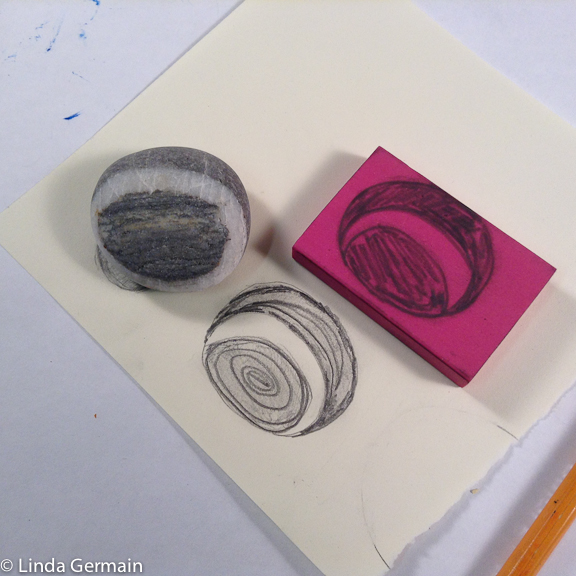
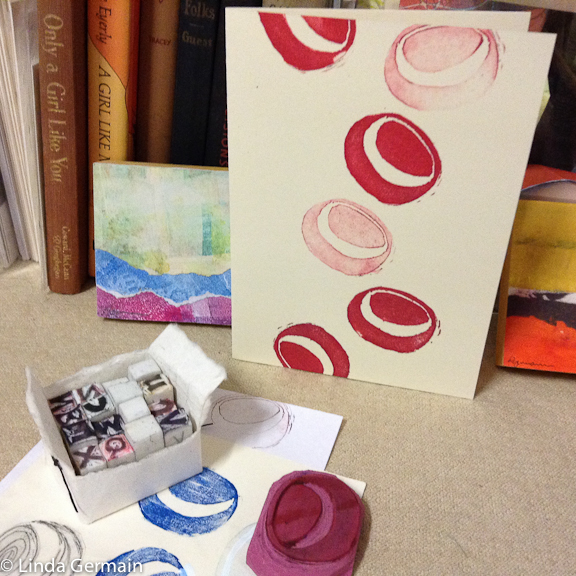
I love beach rocks. This past summer I collected some with stripes and circles in them.

beach rock inspired block for printmaking

So for day 2 of my #SeeDrawPrint challenge I drew out the the basic shape of the rock with the white circle on the edge. Then I transferred it to the eraser block and carved it out.

hand printed card with an eraser block

I printed a note card. I let the abstract stones tumble on and off the page. I did a ghost impression to get a change in value. And I let my design fall on and off the edges.

I thought about adding words to the card, but decided against it. I thought the words would then become the focus and take sway from the stone shapes.

Now to the average viewer, she may not know that it is a stone, but that is ok with me. I like the block as an abstract mark anyway.

Note cards can make good gifts – join us in the new online printmaking class – Printed Gifts. Get the online printmaking workshop details here


Beach rocks inspired print Read More »

Make a Baren for Relief Printing

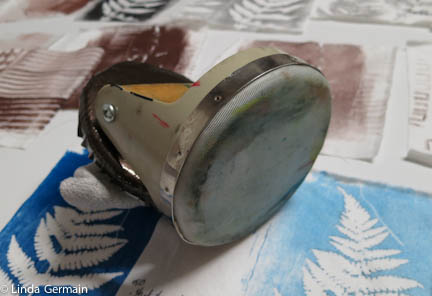
A baren is often used in relief printing to make a crisp even transfer of ink to the paper.

a baren for printmaking without a press - linda germain
Underside of a Speedball baren for printmaking

You can find barens made of bamboo and more modern materials at online stores and big chain art stores.

I like to use what I have before I go buy a new art tool, so I have tried:

  • medium sized jars with flat bottoms
  • a nearby paint bottles
  • and a porcelain door knob

Some folks recommend a wooden spoon. But I like to have a bigger surface.

a handmade baren for printmaking without a press - Linda Germain
a homemade baren for printing without a press – Linda Germain

I made a simple baren with some simple tools that I had in the studio. You will need:

  • clothesline rope
  • double sided carpet tape
  • scissors, knife
  • an old tube sock
  • small piece of sticky vinyl
  • maybe duct tape
  • 5″ circle of rigid foam core

You may be able to substitute some of the supplies with things that you have in your studio. Look around and think outside the box.

The goal is to make a hand held tool that will slide evenly over the paper and help to apply even pressure to the paper. And help you make beautiful prints!

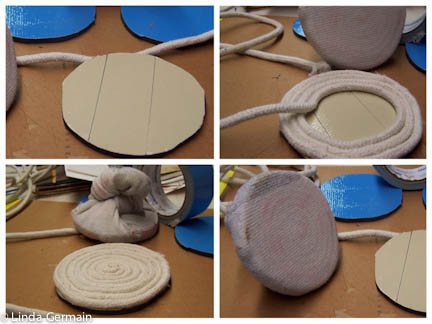
This is what I did to make a homemade baren for printmaking:

  1. Cut a circle of stiff foam core
  2. Cover the foam core with 2 sided carpet tape
  3. Tightly coil clothesline rope on top of the tape
  4. Craft a cover. I used an old tube sock, put the base about 1/2 way through, stretch tight and tie the ends together to create a handle
  5. Finally, I added a sticky vinyl to the bottom, so it would slide more smoothly.

Interested in more history about barens then check out McClain’s.  They have some great info.

If you are interested in relief printing and want to learn more then join us in the next class – check out the printmaking workshop page.


Make a Baren for Relief Printing Read More »

Top tools for making foam relief printing plates

I have gathered my tools for making printing plates with styrofoam trays and sticky back craft foam.

It is low tech and non-toxic but you can still get some awesome results.

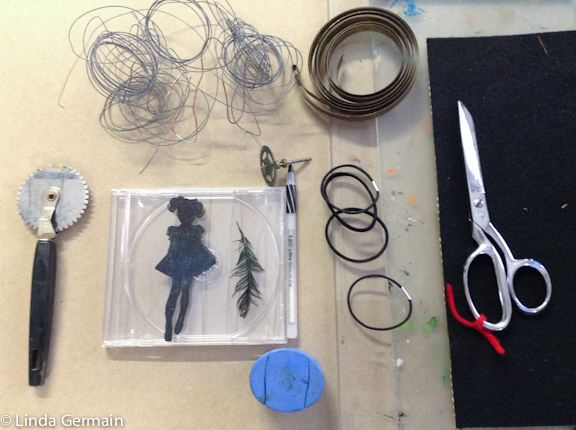
Top tools for making foam relief plates for printmaking without a press

These are my favorite tools:

  1. Pattern wheel makes dotted lines.
  2. Cd case is great for a see through foundation for sticky back foam
  3. Small masking stencils can be combined with the foam plate
  4. Ball point pen is good for drawing strong recessed lines.
  5. Elastics make cool wiggly impressions in the foam
  6. Caps and covers make great round and oval impressions
  7. Metal springs and wheels make strong impressions in the foam
  8. Scissors small and large are needed for cutting
  9. Two strong plexi glass plates make a good see through “foot press”
  10. Soft felt pad makes a good printing surface.

Check out my gallery of some soft plate relief prints – CLICK here.

Foam printing plates ready for printmaking

If you would like to make a bunch of printing plates and learn all the tricks for layering and getting the best impressions from this low tech process, then join us in the next printmaking workshop.

Printmaking without a press and using foam relief plates Linda Germain

  • Class starts August 7th through the 18th
  • 6 short, clear and actionable video lessons
  • Private Facebook group for sharing and Q and A
  • Instructor support, guidance and encouragement
  • Ability to download for lifetime access
  • All for Only $97.00

Registration is open. Go to the printmaking class page to sign up.


Low tech printmaking without a press Linda Germain


This is what people are saying about printmaking courses with Linda Germain:

Marsha happy student in Make Monotypes with Linda GermainIf you think that you can’t learn in an online environment, think again!

You will be amazed at how much you learn from Linda. Each day she shows you techniques, through her very informative videos. You can play the videos again and again to further understand the process.

I learned the basics – making a plate, rolling ink (this took some practice!) and pulling a print. I am pleased with this. I feel that I can really move on and explore this technique in greater depth on my own.

Marsha Hardin Reske – Make Monotypes 

1551708_10202706965505520_168482066_n

Linda is a clear and thorough teacher, who is even open to suggestions. I would recommend this class to a friend.
Barbara Gould – Make Monotypes

simple printmaking with foam plates Linda Germain

SaveSave

SaveSave

SaveSave

SaveSave

Top tools for making foam relief printing plates Read More »

Wear Your ART – fabric prints

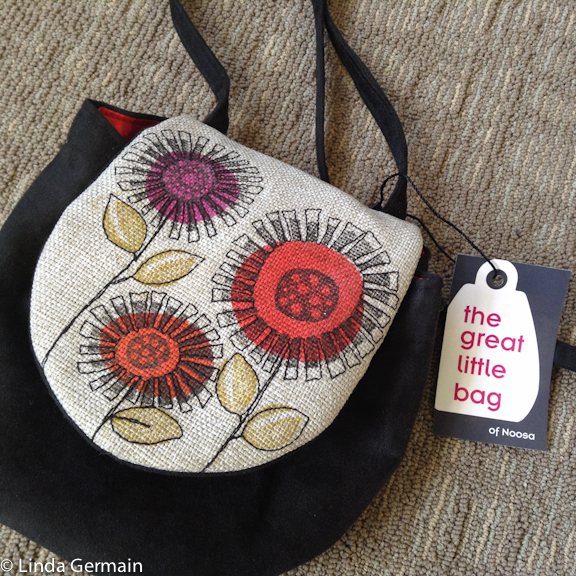
I received a wonderful a handbag from one of my students recently, Chris Cooper of the Great Little Bag, Noosa, Australia.

I was so surprised and proud of the bag the I told everyone about it at recent family gathering.

the great little bag from chris cooper

She told me the flowers were relief prints and the outline is free motion stitching. The long strap allows for me to wear it across my chest and showcases the printed bag at my hip.

The Great Little Bag drew lots of attention and compliments at the Library book sale last weekend.

That got me thinking about printmaking and wearing your artwork. When I finish a piece, a video or some other art I want to stare at it for hours at every angle.

What do you do when you finish a piece? How do you admire it? Do you have ways that you wear your art?

Want to Hand Print Unique Fabric?

Join today and get notice of future classes.

You will also get weekly emails about printmaking, tips, tools and classes.


Wear Your ART – fabric prints Read More »