monotype print

Easy Printmaking with great results

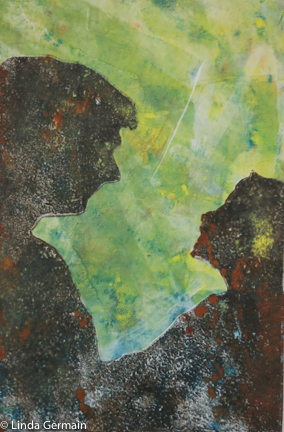
father and son silhouette a gelatin print by linda germainI am always amazed with the amount of detail that is possible with gelatin printmaking.  That is why I continue to do it day after day.

Easy Printmaking

For today’s ICAD 4 x 6 gelatin print –

I am so happy that I committed to doing the index card a day challenge.  It has –

  1. got me gelatin printing daily
  2. posting images on line daily
  3. thinking about my process more
  4. learning how to share that process
  5. feeling good about keeping a commitment
  6. connecting with like minded people

WOW – that is a lot of good from one little index card print a day!  It is not too late to give yourself the chance to have these benefits and more.  Just jump in the group and start making something on an index card each day and then share it with the flickr or Facebook groups.


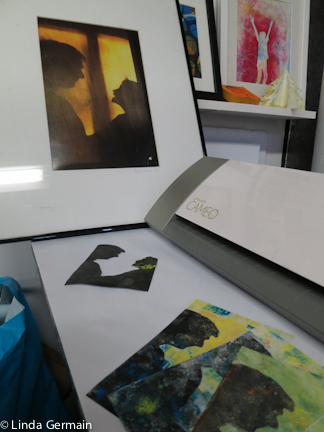
Tools for gelatin print of the day by linda germain

I have included a picture of

  • the cameo machine
  • my other gelatin plate prints
  • the stencil and
  • the photo that was my reference for this gelatin plate monotype print

If you are new to my way of easy gelatin printmaking then check out these online resources to get you printing and having fun.

Happy Printing!

Easy Printmaking with great results Read More »

New Stencils for Gelatin Printmaking

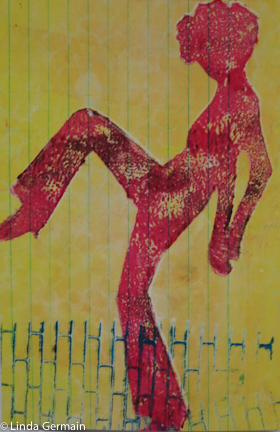
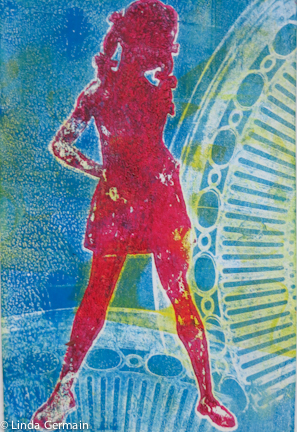
dancing girl a gelatin plate print by Linda GermainA new stencil for today’s ICAD gelatin print.  I found these fun copyright free images from Francesco.  I have used the Silhouette/Cameo machine to cut out several so you will see some new figures in my gelatin plate prints in the next few weeks.

Some steps I took to make these

Stencils for Gelatin Printmaking……

  • isolate the image and save as a jpg in photoshop
  • open the jpg in the silhouette software
  • watched several youtube videos on how to use that program
  • be patient with my learning curve 🙂
  • Trace the outline and create the cutting lines (in the program) easy after I got the hang of it
  • Let the machine cut it out
  • Carefully remove the cut out from the sticky mat
  • Then I did coat it with several layers of mat medium to make it sturdy
  • I cut it out of 90 lb drawing paper, but you could cut it out of plastic, mylar, or other material and then not have to coat the stencil.  I do it this way because I like how the ink reacts with the coated paper.

Play with Printmaking!

Then the fun begins –  I pulled out a stack of index cards and started making gelatin prints for the ICAD challenge.

  • Pre-inked the figure
  • Set it to the side
  • Ink the gelatin plate with yellow speedball block printing ink
  • ink the bottom of a flip-flop with blue ink then
  • stamp on to the the yellow layer of ink
  • Place the figure ink side down  on the gel plate
  • Place print paper on top
  • Burnish
  • Sneak a peek
  • Peel back the paper BUT still stuck to the gelatin plate
  • Remove the stencil
  • Roll the paper back down  and
  • Burnish again
  • Peel it off the plate and ADMIRE!

Happy Printing!


New Stencils for Gelatin Printmaking Read More »

Secrets for Powerful Gelatin Prints

  • gelatin print by linda germainPlay a lot!
  • Make lots of prints
  • Find what you love
  • Apply some design concepts
  • Create a focal point

So those are my secrets for gelatin printmaking.  Try it an see what happens.  Then share your success or challenges with the Flickr group.


Small Gelatin Print here-

  • Three layers of primary colors
  • stamping tool to lift off ink – geometric design
  • underlying layer of yellow something
  • pre-inked red figure to create a focus
  • notice the placement and division of space

Do you think this gelatin plate print works?  Do you find it interesting?


If you would like more help or tips for gelatin printmaking then check out these pages

FAQ page for gelatin printmaking

A video and 3  helpful hints

Quick Links to gelatin printmaking help

Secrets for Powerful Gelatin Prints Read More »

a few Gelatin Printing Steps

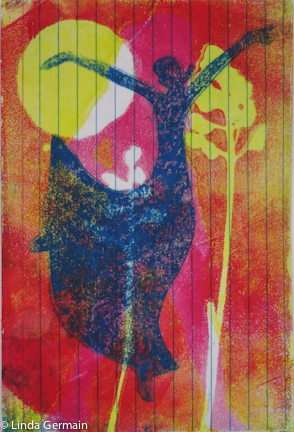
Shaped layers in this Gelatin Plate Print by linda GermainShaped layers in this gelatin plate print. Sometimes it is hard to look at a gelatin print and remember what I did. This one was created in 3 pulls.

Gelatin Printing Steps

  • layer of magenta with a circle masking stencil, and 2 pieces of grass
  • layer of yellow ink with a unrecognizable masking stencil
  • Pre-ink the dancer stencil
  • Place ink side down on the gelatin – to release the ink on to the gelatin plate
  • then print the dancer on to the index card.

I like the –

  • lines of the index card showing through
  • the strange combination of images
  • bright colors

I am finalizing a new video.  Sign up for the newsletter and be sure to see it.

Happy Printing!


a few Gelatin Printing Steps Read More »

Multi-colored Gelatin Plate Monotype in one step

gelatin print by linda germain on map

I say one step but a more accurate word would be a multi colored gelatin plate monotype print in one pull.  There are lots of preparatory steps to this gelatin print.

  • cut and gather the map pages
  • pre-ink the glasses stencil with black/blue ink
  • set the stencil ink side down on the inked plate
  • pull a shaped print on another piece of paper
  • do a newsprint pick up
  • Roll the orange/yellow ink over the glasses stencil and on to the gelatin plate
  • carefully remove the glasses stencil from the gelatin plate
  • Place the map page on the plate and burnish
  • Sneak a peek to see if you have picked up all the ink possible
  • peel off and admire your gelatin plate monotype print

As I said yesterday, I like to make a lot of  gelatin prints to get a few great ones.  So when I made this print, I had to make several to produce a few awesome prints.  The less than lovely ones always have potential to become something else.


Embrace the freedom to experiment with your ……………

Gelatin Plate Monotype Prints today!

Multi-colored Gelatin Plate Monotype in one step Read More »