monotype print

Add a focal point and finish some prints

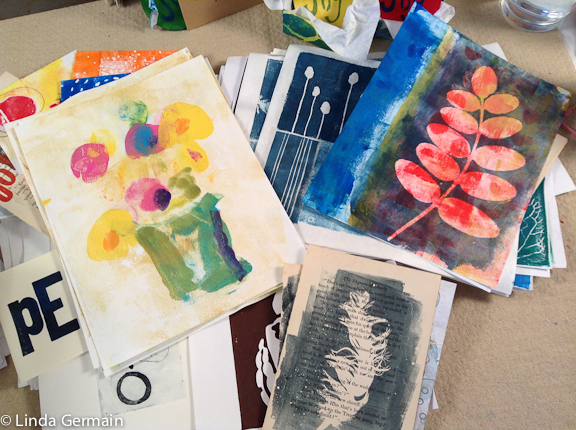
It is easy to get caught up in the process of gelatin printmaking. It is fast and spontaneous. I will often pull many prints and not really have any one print that is finished.
various mixed media prints by linda germain

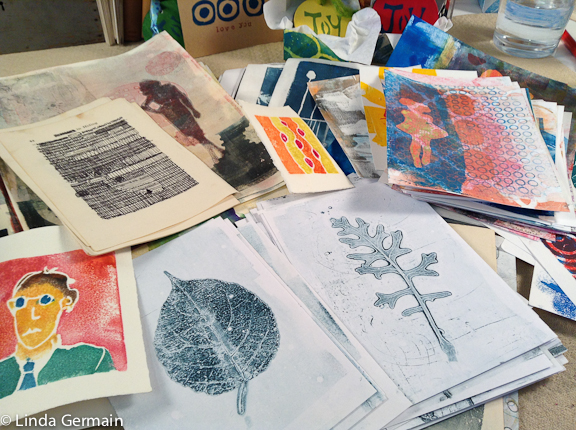
Add a focus to complete your print

One way to complete a print is to add a focus. Ask your self:

  1. What is the print saying?
  2. Does it have a feel?
  3. What kind of mark would compliment and complete the print?

Sometimes it is easy to answer those questions and other times the print is just in its infancy.

Monotype Print with glycerin plate by Linda Germain
surprise layers

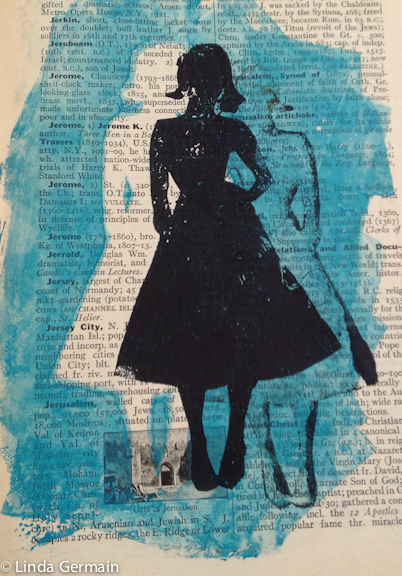
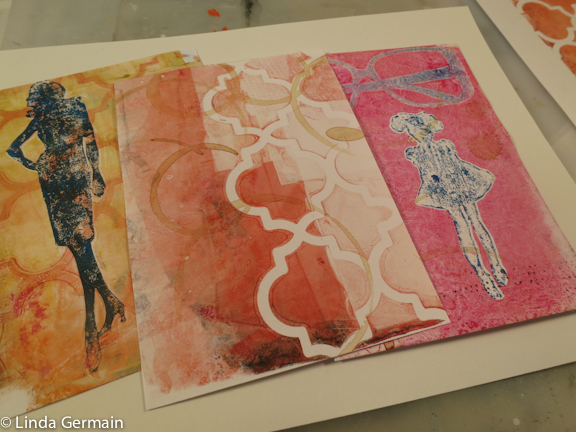
This print above was just a blue and black “newsprint” pick up. And by added the black figure I created a focus and also embraced the design principles of variety and repetition.

Printing design principles

My suggestion to you is:

  • notice how your eye travels around the print
  • allow for surprise
  • aim for a dynamic range of values from very light to very dark
  • limit your tools (don’t try to do everything) in one print
  • give yourself time and space to develop your design skills
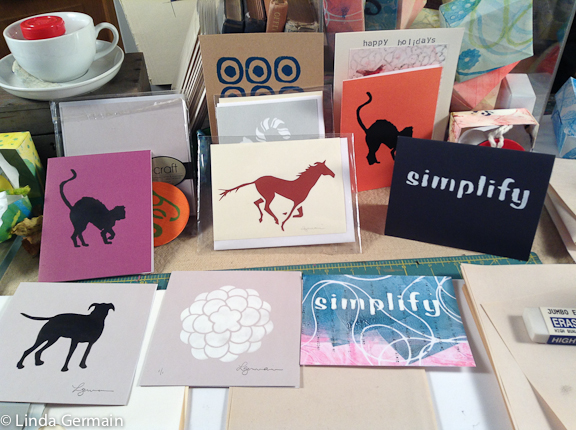
  • simplify, simplify simplify

crop and complete monoprinted cards

If you would like to explore printmaking – check out the current online printmaking classes.


Add a focal point and finish some prints Read More »

Gathering prints in progress

Today I went around my studio gathering up all the prints that I have done this year. I am getting ready to to sort through and finish a few for the holidays.

monotype prints by linda germain

I really am a process person. I love figuring out how to make printmaking techniques work for me. There is a lot of trial and error, but that is the fun part for me. So there are plenty of less than pleasing prints in the process.

Monoprints by Linda Germain

I say to myself, if I get 2 good prints out of 10 that I make then I am doing good. I think it takes time to get to know the inks, paper, and materials and how they all work together.

various mixed media prints by linda germain

I try to give myself permission to fail fast and often. That way I get closer to success sooner. Now that I have my prints all together, I can sort through and put them:

  1. Love it!  Done ready to mat and frame.
  2. Needs a little something to call it complete
  3. Paper with potential, yet needs collage, cropping  or a lot more layers.

I challenge you to gather all your art, prints, drawings from this past year in one space and sort through them. See what you discover.

Check out current classes being offered.

Gathering prints in progress Read More »

Printing unique paper for printing projects

I love experimenting with printmaking processes. I don’t always know how I will end up using the printed papers that I make.

Marbling paper for printing projects

I tried a variety of marbling products, the Suminigashi kit, alum coated paper with waterproof india ink and thin watery acrylics on a liquid starch bath.

I found that the type of paper is very important. The best results were on rice paper and mulberry paper. Most of my other papers gave a faint impression or did not absorb the inks.

Marbled rice paper

I did so many papers that I figured out a few things:

  • I like a simpler modern style of marks
  • Do 2 or 3 colors max
  • Use a big juicy water color brush
  • It holds and therefore can release more ink
  • Get clean water often
  • Skim of the top
  • Let the water get very still
  • Use very diluted detergent as a dispersant

Some of my goals were to use the papers that I already have in the studio, get a richly pigmented impression and to learn what I like. So for me it is rice paper, the suminagshi kit and a big pointed water color brush. I worked small 5 x 7 and used a foam tray as my container.

Check out current workshops.

Printing unique paper for printing projects Read More »

Watch videos and then start Printmaking

We are so lucky! The internet has made learning so accessible.

Here try it!

Learn how to ink your brayer.

The goal is to get a thin, even layer of ink around the whole brayer.
  • Put a small amount on one corner of your palette
  • Pull a small amount out from the big “blob”
  • Let your brayer spin around and around to evenly coat the whole brayer
  • Turn your brayer perpendicular to itself to work your ink up in a small area of the plate

Trouble shooting:

  • Brayer is just slipping – too much ink, or are you using acrylic paint or a very fluid ink
  • Too much ink in one spot – to fix roll ink in the clean areas of the palette, this will work to get rid of some of the ink on the brayer, but wastes ink by just spreading it all over the palette
  • Ink only on one side of the brayer – Lift the brayer up and let the brayer spin all the way around. Most folks roll the brayer back and forth and that only works the bottom half of the roller.

Inking the Brayer – Tips

  • Put out a small amount of ink, because you can’t put it back in the tube but you can always put more or your palette
  • Know that all inks act differently, so be patient and give yourself time to learn how to get the most from your ink
  • Oil and water don’t mix, so know what kind of ink you are using
  • Always clean your brayer carefully and don’t let permanent inks dry on it.

Want more info, videos and inspiration then join us in the next workshop. Check out the details on the printmaking workshops page.

Watch videos and then start Printmaking Read More »

Time to take a Printmaking Class

Give yourself the gift of time to practice your art.

I love September. It is all about going back to school. So I gave myself the gift of an art class. You could do the same.

Make Monotypes is a 4 week online printmaking class and it starts on September 19th. One student’s experience:

PRU2It was the best 4 weeks I can remember ever having in February! Linda’s preparation and planning for the class were flawless, and if we still had questions about the process, she never hesitated to think of different ways of explaining it.

I loved finding that there were participants from all over the world. It was a truly rich experience! The class left me with a huge curiosity about what I can now do on my own. Printmaking will continue to be a huge part of my art-making!

Just that I’m very grateful for Linda’s consideration, sensitivity, and sense of humor.
Pru Barry – Make Monotypes

You will get 40+ videos that are designed to get you printing and making lots of impressions. The class is 4 weeks of tiny actionable steps, so that you actually do the lessons.

Here is a summary of the lessons:

Week 1 – Jump in and make the printing plate. Get to know all about masking stencils.

Week 2 – Explore Texture – find and create mark-making tools that are used to lift off or apply ink to the plate. The inspired by your surroundings and make several tools of your own.

Week 3 –  Combine and Control – This week take those marks, prints and images to a more developed a more controlled or satisfying monotype prints on  paper. Learn  to create and use a masking frame.

Develop control in your gelatin printmaking

Week 4 – Papers and Possibilities –  Consider the substrates and surfaces that you are printing on.  We will learn about refreshing and restoring the plate. We will make decisions about finishing prints and make a plan for continuing the series of monotype prints. Make a commitment to your continued growth and success.

If you are on the mailing list, I have sent you a special discount so check your email box and join us today! I am sure that you will pull lots of prints that may even become holiday gifts.

Read the details here on the printmaking class page and register today.


Time to take a Printmaking Class Read More »